My new desk setup
I thought my home-office setup was in need of a spruce-up and given I still had plenty of home-office budget (thanks Hotjar) I went on a bit of a shopping spree.
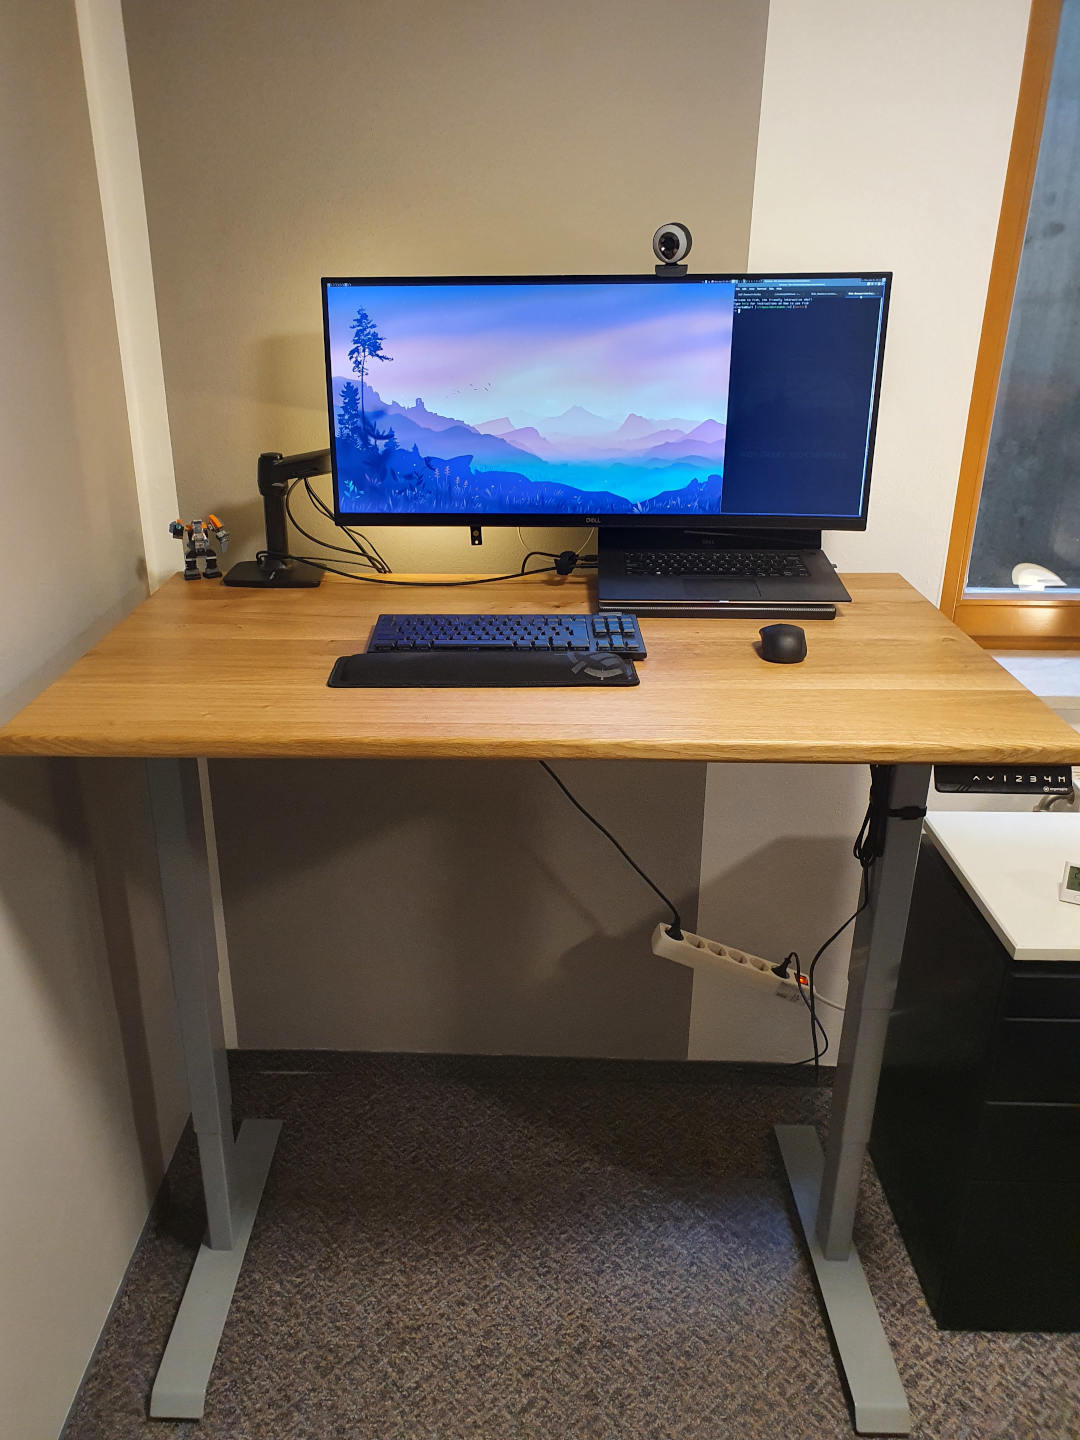
Here's the finished desk:
The standing desk
The table-top
I found this nice looking Rikmani table top on Amazon and ended up buying it.
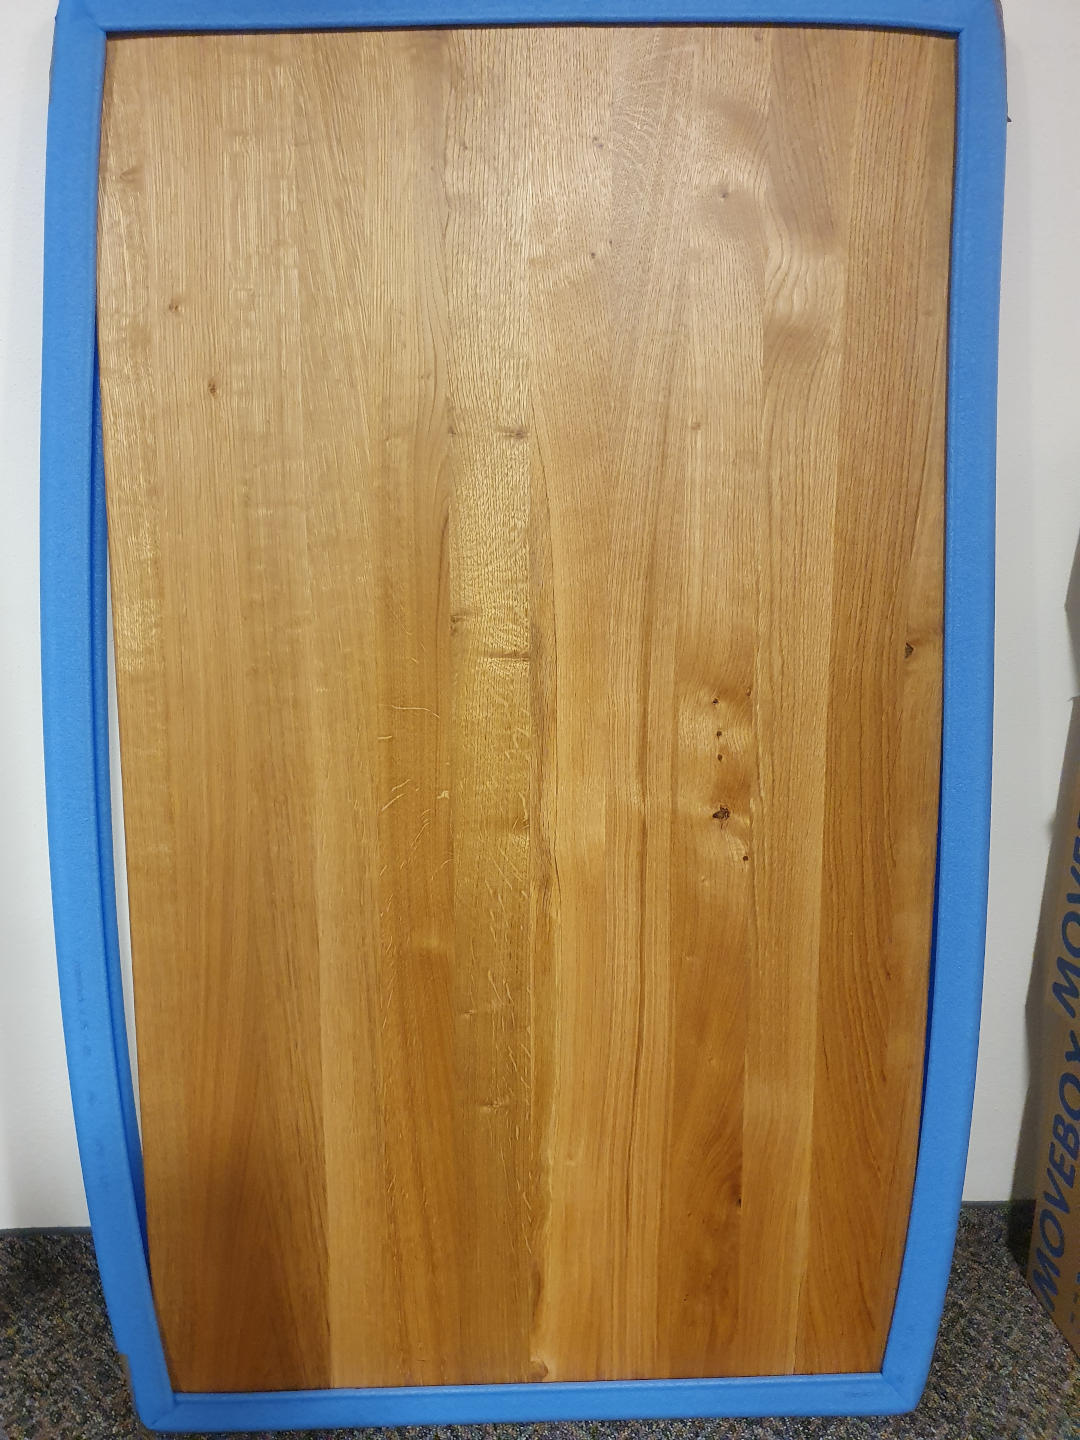
Since it's on the expensive side, I first looked at OBI for some nice wood table tops, but I was not pleased with what I found and went ahead with the Rikmani one. An un-finished table-top would have required me to stain and finish it, which is a potentially messy multi-day process, and I really wanted a rounded edge at least on the side where I sit. Going full DIY would have been to complicated, especially given I don't have all the tools, I have no real woodworking skills, and my goal was to simply to have a nice desk.
Killer-feature: rounded edges. I didn't even know I wanted this until I saw the option with the above Rikmani table top. My biggest annoyance with the old table top was how the sharp edge "digs" into my arms sometimes, but it never really occurred to me that there's an easy fix: round the edge. It is as comfortable as I imagined it would be, and I'm very happy with it.
The standing desk frame
I picked an Ergotopia Desktopia Lite, based on reviews mentioning stability. Some of the other options on my shortlist had several reviewers complaining about slight wobble when the table is raised, and that would have been a major annoyance. I'm very happy that it indeed is stable. I only get slight wobble (amplified by the monitor arm) if my chest is pushing into the table when typing, so I just have to back off a bit when I notice this.
Assembling the two
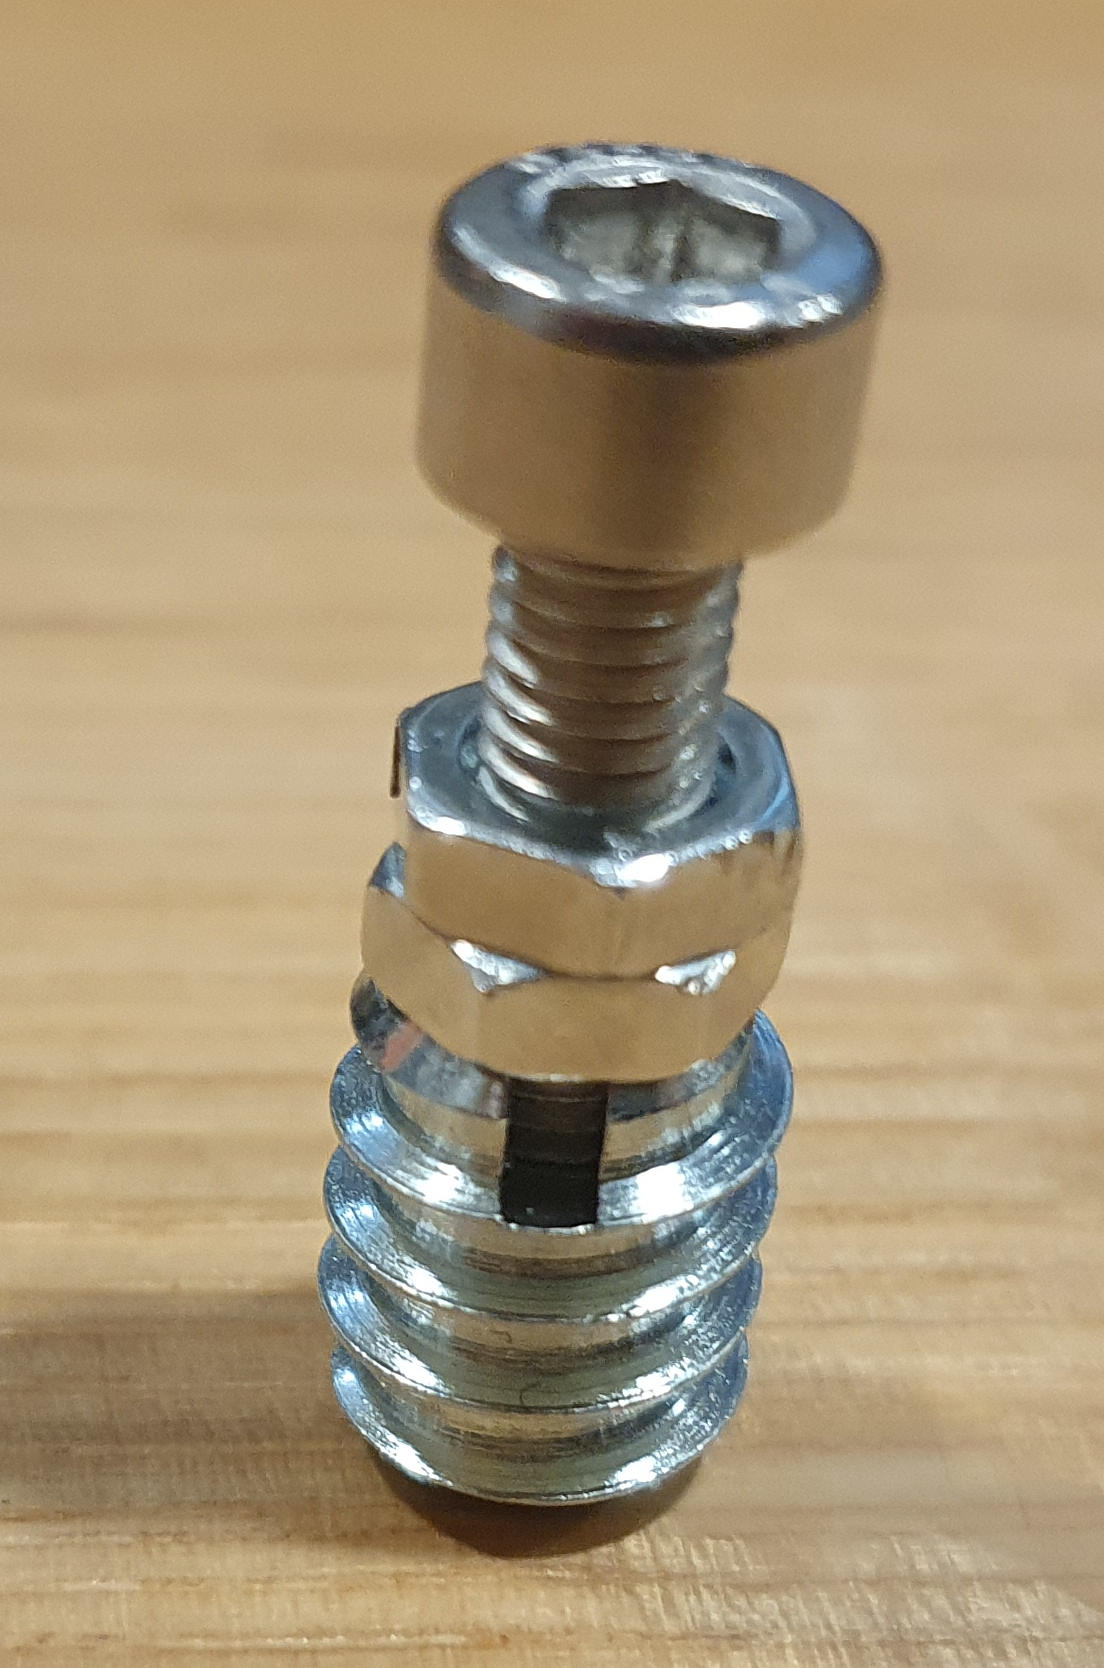
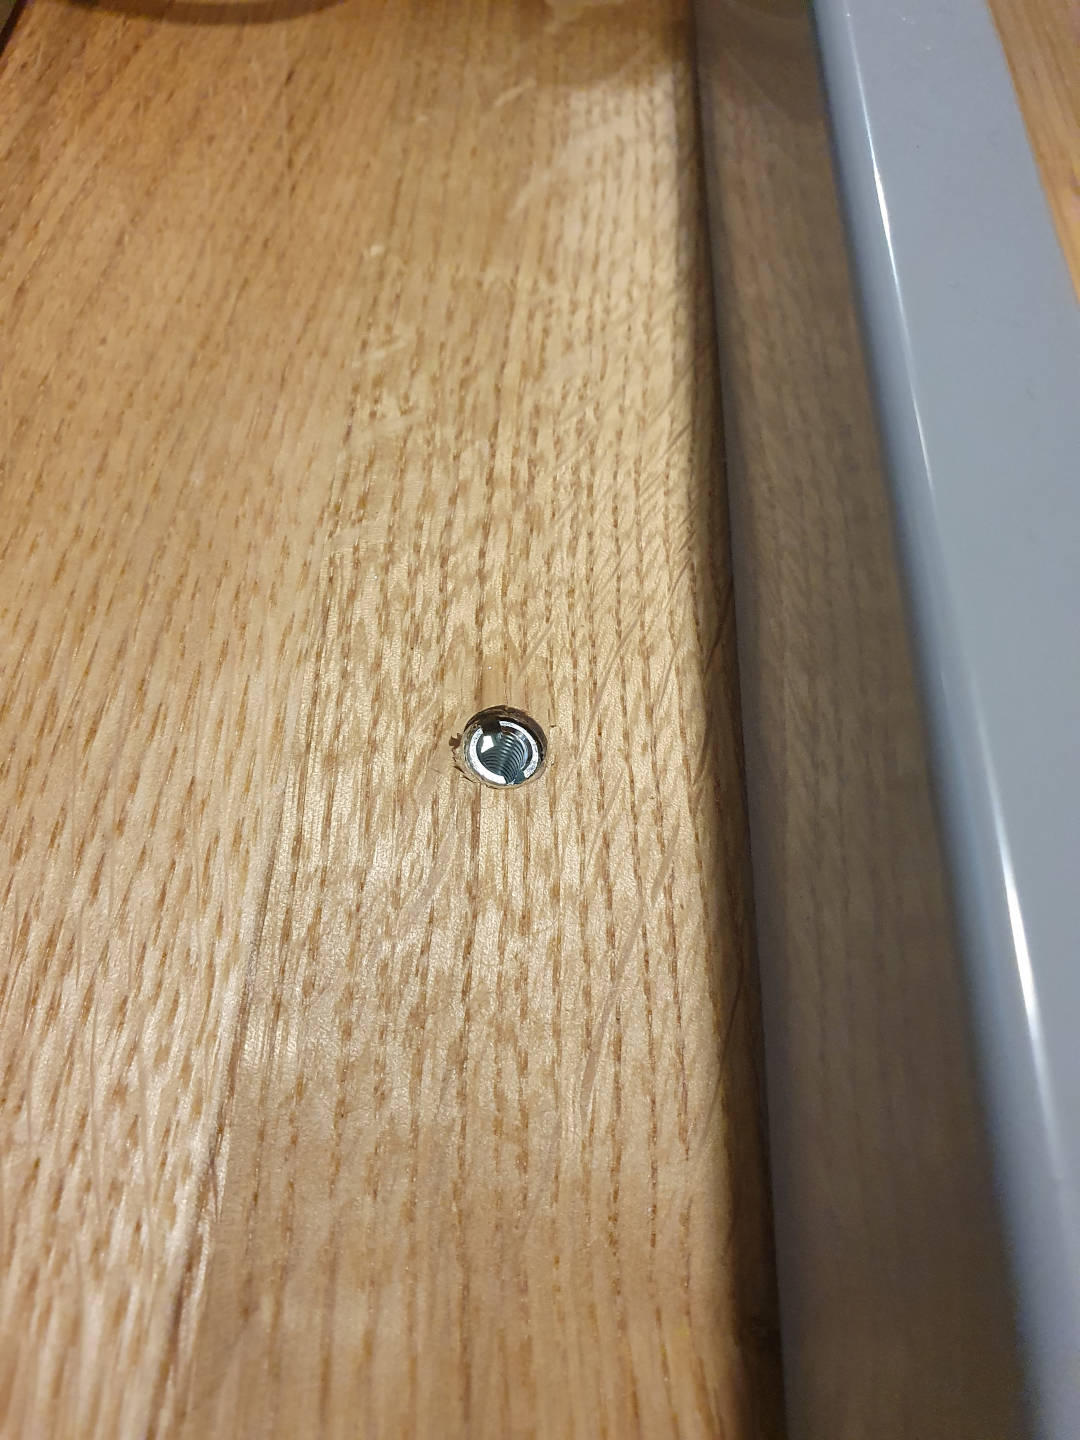
My one advice would be: use Threaded Wood Inserts instead of the included Wood Screws. This will make disassembly much easier and ensure your table-top survives multiple re-assemblies. Wood screws can only be un-screwed/re-screwed 2-3 times before the wood is worn out, but a threaded insert will remain in the wood and you insert a screw into that avoiding the wear on the wood.
I picked up these at a local hardware store (Hagebaumarkt):

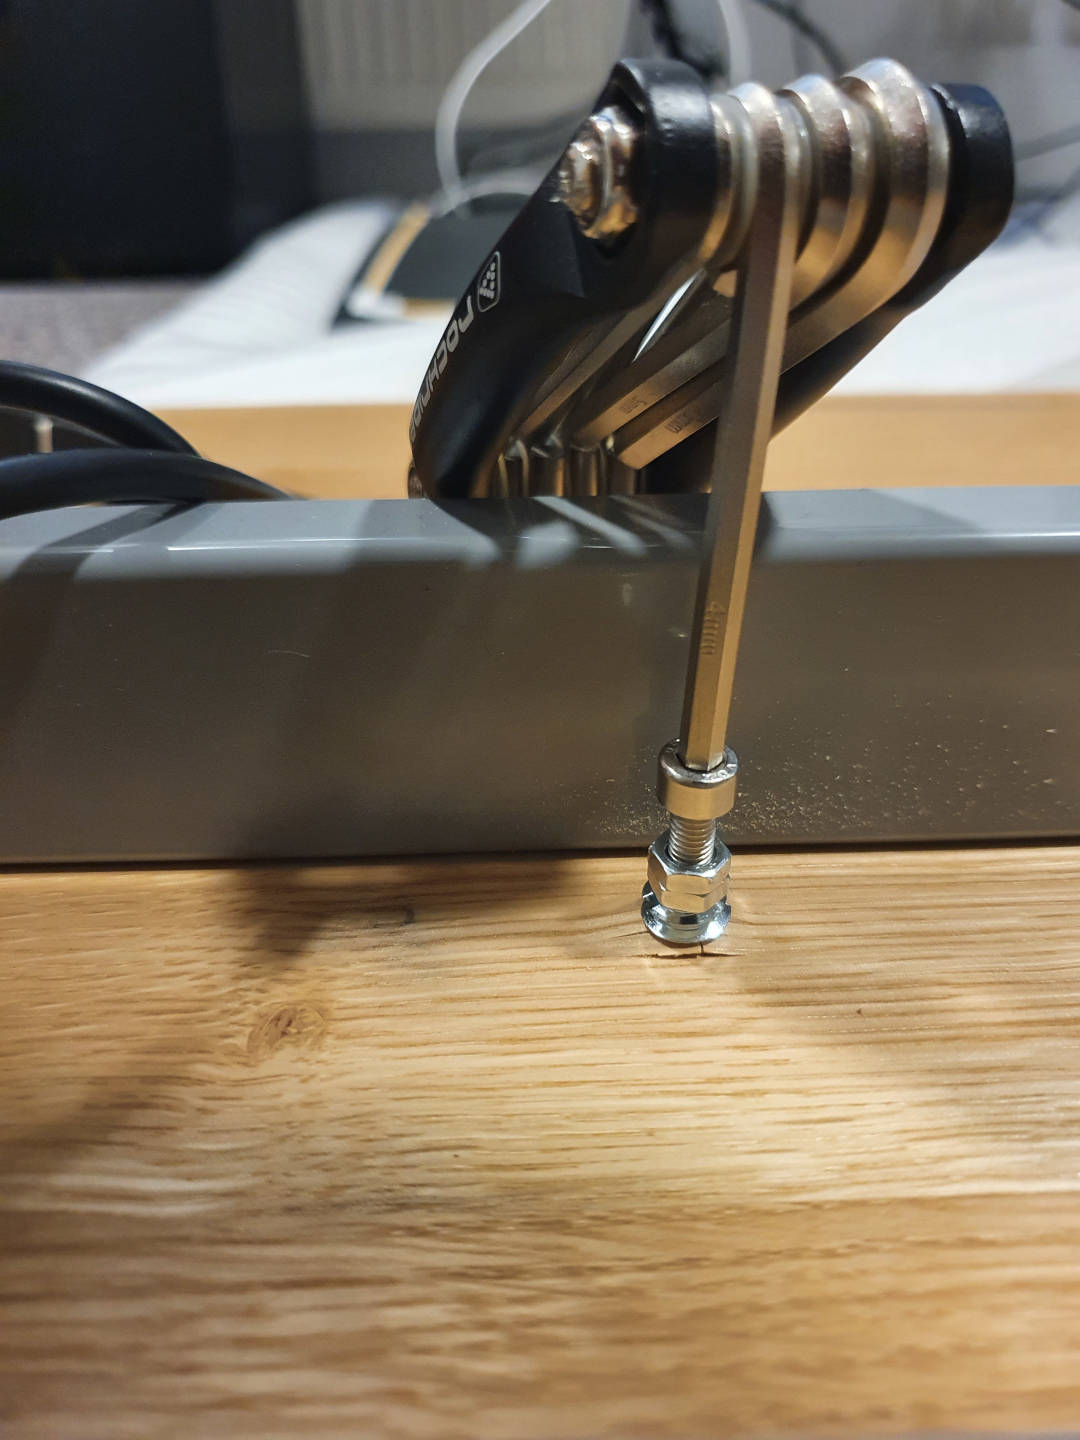
You will need to drill holes in your table-top to place the inserts. If you have the insert type which can be inserted with a flat screw driver, they can be a PITA to insert. One trick I found online is to use a longer screw with 2 bolts, as this way it's easier to make sure the insert is straight:

The Monitor and Peripherals
Monitor and Arm
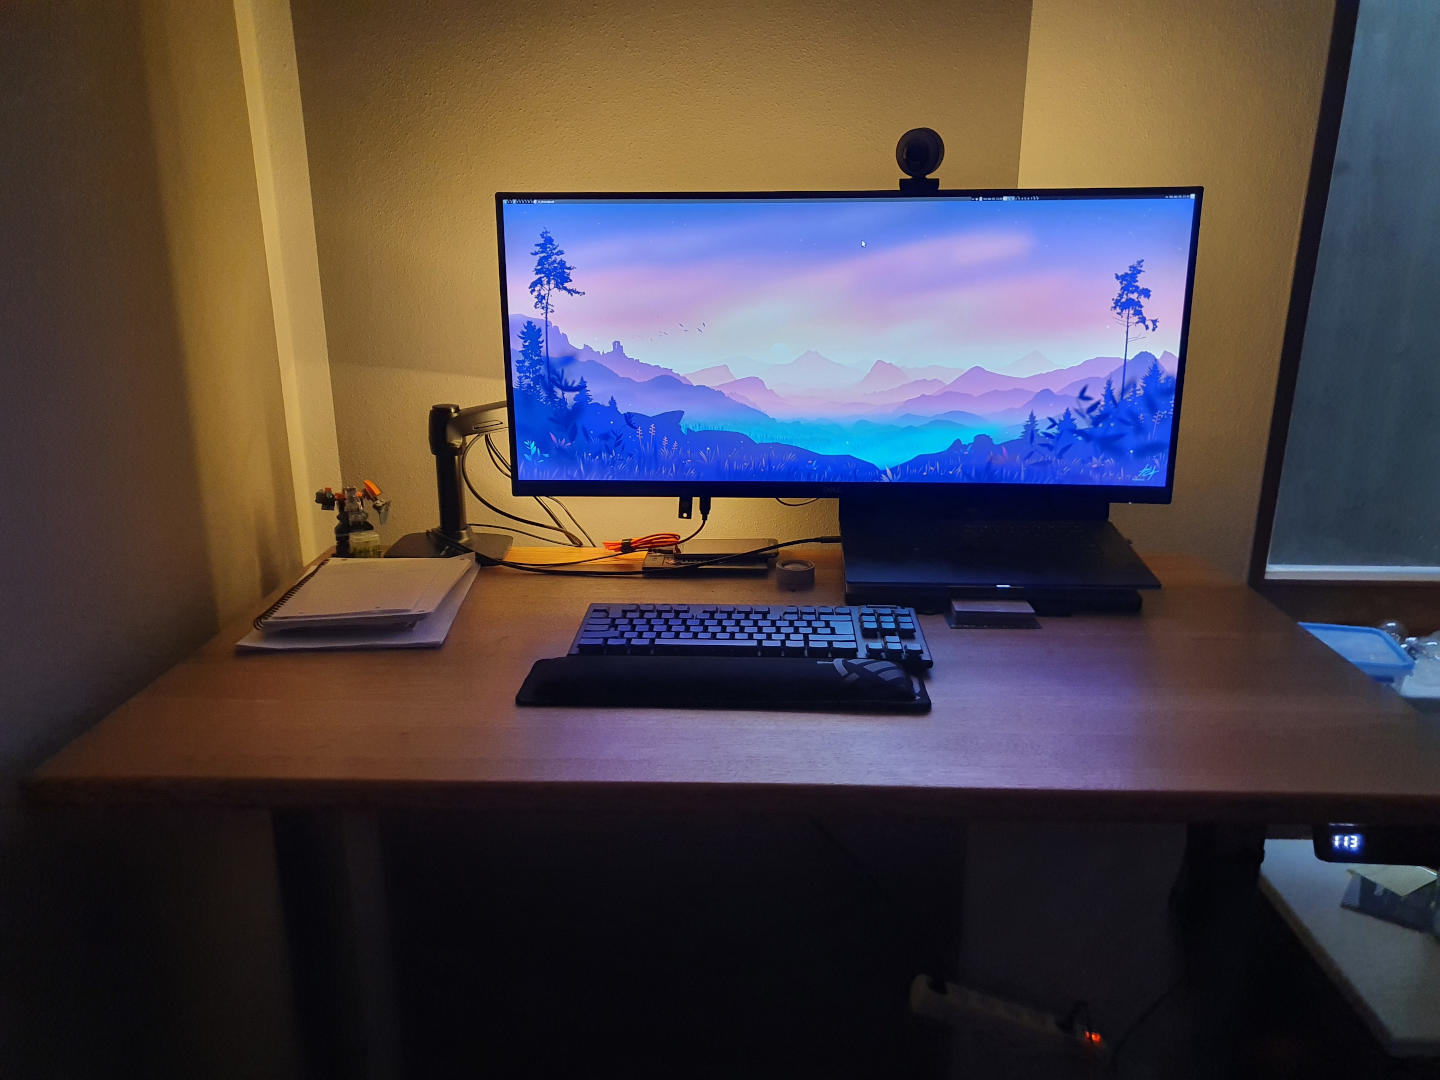
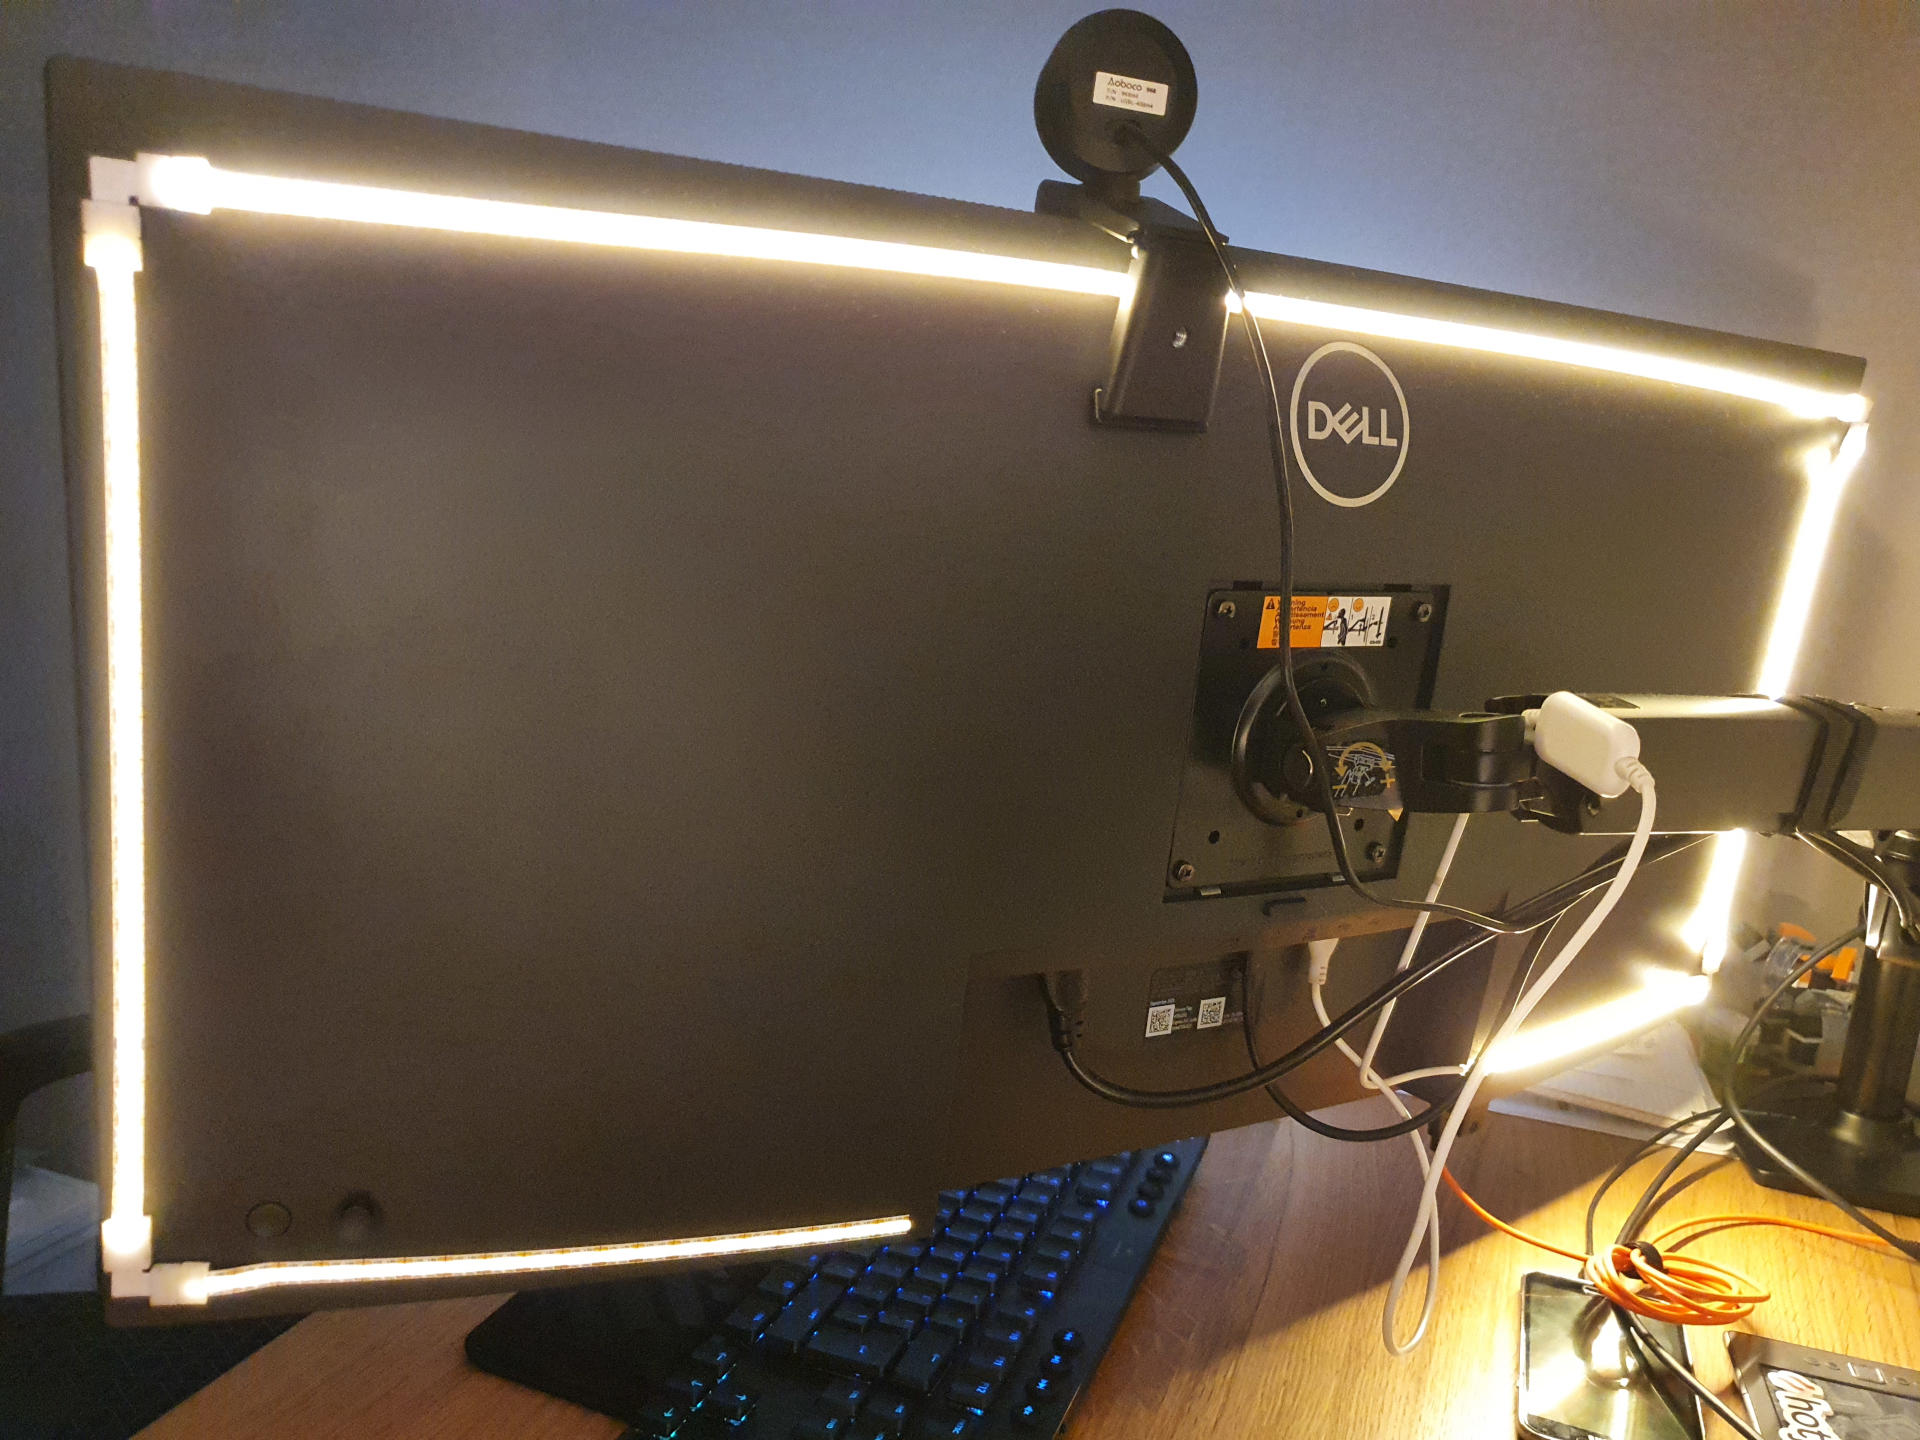
I thought a curved ultra-wide would make for a nice coding monitor and I must say it's working out well. I picked up the Dell P3421W and paired it with an Amazon Basics Monitor Arm (see it in action here).
The cool thing about the monitor: I can connect it to my XPS over thunderbolt for the display and it powers my laptop and works as a USB hub, so I can have some peripherals plugged into the monitor. This means slightly fewer cables to un-plug when I change location. Sadly, the built-in hub can't handle bandwidth-hungry devices like my webcam, so I am not able to get by with a single cable, but two (for an additional small USB hub, stuck under the desk with blue-tack). Still it's more comfortable than my previous setup which had 3 cables USB hub, 1 HDMI and power.
Small word of caution: the thunderbolt cable which came with the monitor, and the monitor arm, didn't play nice together. The "arm fully lifted" position would tension the cable to the point where the USB-c connector broke off. I think this is on me as I should have made sure enough slack is there or at least been careful to readjust the cable when putting it in this unusual position, or even better I should have disconnected the cable as I was moving the arm around on the new desk. Several attempts at installing and removing the monitor, to find the sweet spot, kept bringing it to the "fully raised" position and the repeated stress broke the cable.
Monitor Backlight
This one is quite straight-forward: in order to get some ambient light, I taped a LED strip to the back of the monitor.
Ultra-wide window-manager hacks
More cool stuff: this ultra-wide provides almost as much screen real-estate as one and a half monitors, and my window-manager of choice (awesomewm) has support for virtual screens. I've been able to tweak things to the point where I have 2 virtual screens with a 3/4 + 1/4 split. I can also resize them on the fly and switch to a single virtual-screen layout easily. This is achievable with core awesomewm functionality: fake_add and fake_resize, and you can read the details in this other post.
This is a great productivity booster for me:
- I tend to use the "second screen" when coding, to run tests on a loop.
- Sometimes I move a call to the second screen, and use the "main screen" to look up relevant information. I find 2 virtual screens makes this a lot easier, as I can still use my regular window-manager flow (tile windows, jump between workspaces) on the "main screen" while the call stays in place on the "second".
Keyboard
For a keyboard I got the Logitech G915 TKL (no numpad), with tactile switches. I find it a big improvement over the XPS15's built in keyboard that I was previously using (and even that one is quite nice as far as laptops go). The one small downside is the noise level: it's a bit more noisy than I had expected and given I share the "home office" with my girlfriend, it is a small annoyance. I've found that simply placing the keyboard on a microfiber cloth dampens the sound down to acceptable levels.
Wrap up
And that's it, this is my new and improved workspace.
Next plans: I'm probably going to try to add some green to my field-of-view and add a plant, probably a https://en.wikipedia.org/wiki/Dracaena_trifasciata, as it's supposed to be quite tolerant of low light conditions (my office is in a basement, and there's very little natural light)
Oh yeah, and I need to up my cable-management game :)